At its core, vehicle wrapping is about transforming 2D objects into 3D. By wrapping compound curves, distortion is inevitable. The task of the installer is to manage that distortion effectively. One of the best ways to do this is with the Pre-Stretch and Shrink Method.
What you’lL learn:
Transforming 2D objects into 3D introduces distortion.
An efficient technique for addressing distortion during application.
Comprises four steps – Heat, Stretch, Apply, and Shrink.
Film naturally conforms to curves when stretched due to its properties.
Follow the sequence: heating, stretching, applying, and then shrinking.
Apply the Pre-Stretch and Shrink Method to vehicle parts.
Play Video
Share this video:
The Pre-Stretch and Shrink Method
What is the Pre-Stretch and Shrink Method for Vehicle Graphics?
In a nutshell, the Pre-Stretch and Shrink Method goes like this:
Heat
Stretch
Apply, and
Shrink
This takes full advantage of the film’s memory effects when conforming around the curves. Notice pulling a film outward, the film curves in a direction perpendicular to the stretch. When pulling to the midpoint of opposite edges, for example, that’s where the tension is. And these stretches, without any stretch, fold down.
Now, let’s add two rods to show where the Pre-Stretch and Shrink works. Rather than stretching the film only from the midpoints, these rods will allow the film to stretch evenly.
Wrapping Compound Curves on a Vehicle
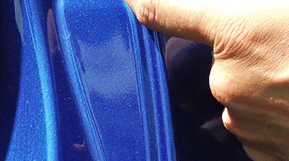
Let’s look at the door handle to see the Pre-Stretch and Shrink Method in action.
Improper Technique of the Pre-Stretch and Shrink Method:
If we were to apply film over the door handle, with no pre-stretching, and add heat, the film would simply lie flat over the area. We would then need to stretch it to conform to the handle.
Instead, let’s let the film’s memory do the work.
Proper Technique of the Pre-Stretch and Shrink Method:
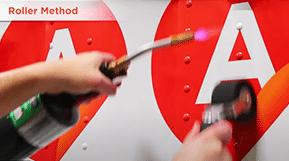
Step 1: Heat
First, I’ll fold the rods and apply heat to the film. (105ºF – 120ºF/ 40ºC – 50ºC)
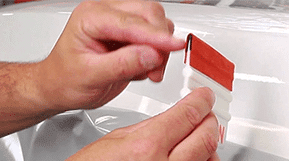
Step 2: Stretch
Then, I’ll stretch the film by at least 30%. Remember, we would always want to stretch the film perpendicular to the curve.
Remove the heat and let the film cool down in its stretched form.
Step 3: Apply
I’ll then remove the rods and apply it to the flat section of this door handle. Where the film has been applied, the stretch will be fixed.
Step 4: Shrink
Now, when I apply heat to the apply section, it wraps itself around the door handle.
This technique can be used on all compound curves of the vehicle. Front and rear bumpers, cant rail, door handles, side view mirrors, small spoilers, and corners. The Pre-Stretch and Shrink Method will allow you to take advantage of the natural behavior of the film. So remember: Heat, Stretch, Apply, and Shrink.

 Instead, let’s let the film’s memory do the work.